Each project grade is split into two components: functionality (passing tests) and design (passing code review). This guide details the process for getting credit for project design.
We use one-on-one code reviews with the instructor to evaluate your project design. We will be looking for the following when reviewing your code:
- Your code should follow proper code style and naming conventions.
- Your code should have no warnings.
- Your code should be well-documented using Javadoc notation.
- Your code should be object-oriented.
- Your code should be encapsulated, generalized, and reusable.
- Your code should be memory-efficient and time-efficient within reason.
This list is not exhaustive, and exactly what we look for will vary by project.
This process, while used for grading, is better viewed as a one-on-one personalized training on how to refactor your code. This process only works if you are the one that wrote your code!
One-Time Setup
There are two components you need to setup: Code Climate and Github Actions. You only need to go through this setup process once.
Join Github Organization
If you haven’t yet, accept your invitation to the usf-cs212-fall2020 organization on Github. You can accept it by logging into Github and visiting:
https://github.com/orgs/usf-cs212-fall2020/invitation
This gives you read access to certain repositories that are otherwise private.
Setup Code Climate
You need to setup Code Climate, which will give you an automated maintainability rating for your code. You cannot have code review until this rating is B or higher.
To setup your Code Climate account, go to:
https://github.com/usf-cs212-fall2020/join-code-climate
You will see the following prompt:
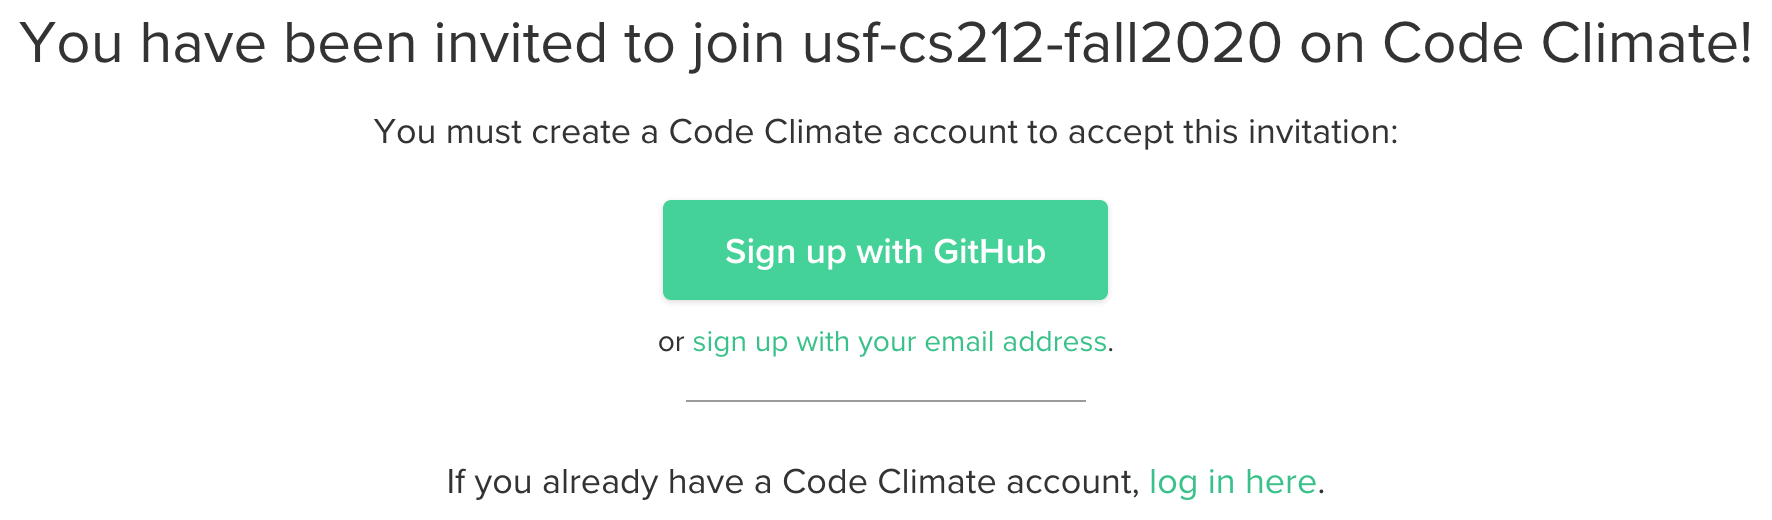
You must click the “Sign up with GitHub” button and use the same Github account you use for this class.
You should then be able to see your repository listed at:
https://codeclimate.com/dashboard
Select the usf-cs212-fall2020 organization if prompted.
Setup Github Action
You need to setup the Github Action for requesting a code review. This involves placing a request-review.yml file in your .github directory.
-
Open the latest
request-review.ymlfile on Github. -
Click the “Raw” button and then save the file to your system.
-
Go to your project repository on Github and navigate to the
.github/workflowsfolder. -
Click the “Add File” button and select “Upload Files” from the menu.
-
Select the
request-review.ymlfile you just downloaded.
The “Request Review” action should now show up in your “Actions” tab on Github.
Code Review Eligibility
Before making a code review request, you should make sure you are eligible:
-
Do you have credit for the functionality of the current project?
For example, if you want a design grade for project 3, you must already have a non-zero functionality grade for project 3.
-
Do you have credit for the design of the previous project?
For example, if you are on project 3, you must already have a non-zero design grade for project 2. If you are on project 1, you can skip this check.
-
Does your code compile without any Java or Javadoc warnings?
There are two ways to check this locally. First, configure Eclipse to show you warnings. Second, you can install the Maven command and run this from your project repository:
mvn -ntp -f SearchEngine/pom.xml clean compileThe command above assumes your working directory is the
project-usernamedirectory whereusernameis your Github username. This is the same command run by Github Actions to check for warnings. -
Does your code have a
Brating or higher on CodeClimate?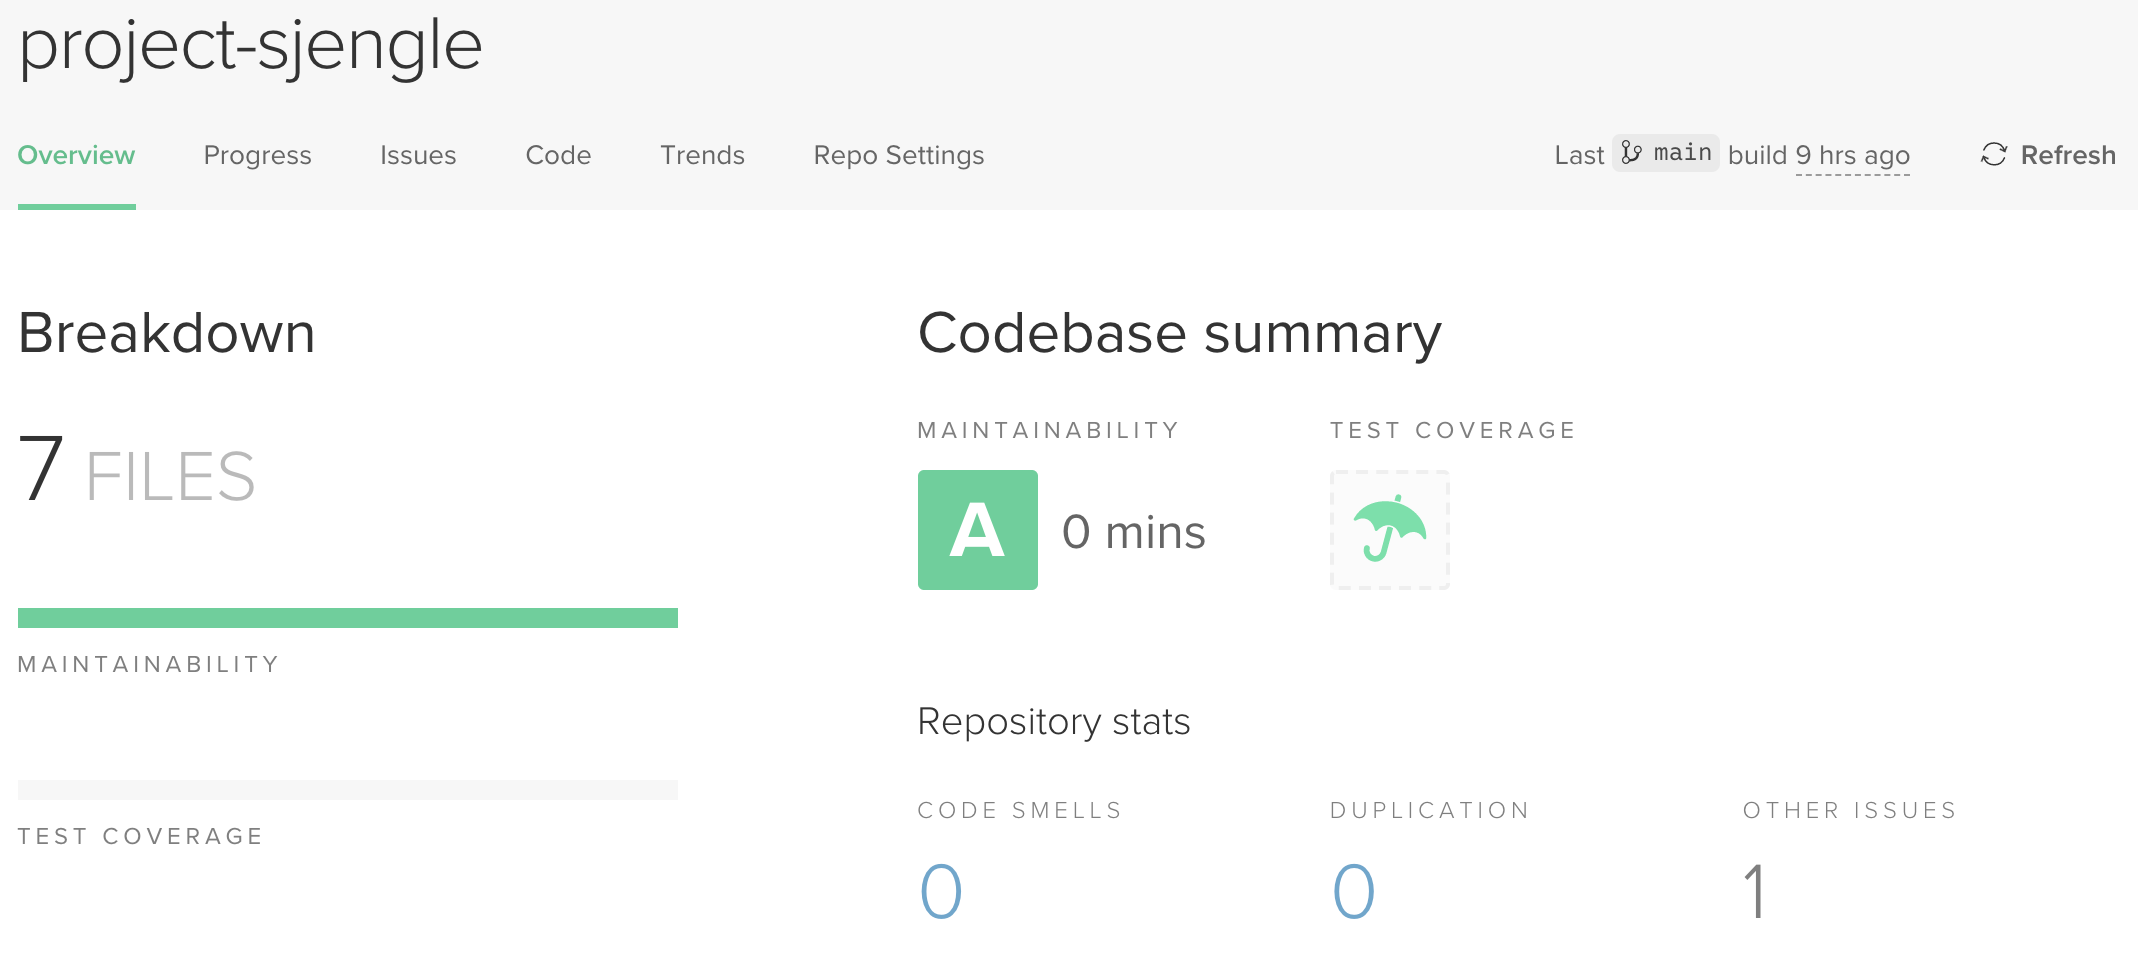
If your code does not have a
Bor higher rating, you need to address enough issues to raise that rating before signing up for code review. -
Do you have a release for this project that 100% passed the verification action?
-
Are there 0 commits to your
mainbranch since your release? You can check for commits on the releases page:
If you have made changes to your
mainbranch, create a new release with the latest changes before requesting review. We need to know the code being reviewed passes the tests! -
Was your previous appointment last week or earlier?
You can request at most one code review appointment per week. This does not guarantee an appointment per week! If you request an appointment late in the week, it is unlikely you will get one that week.
If you answered yes to all of the above, you can request to have your project design graded through the code review process.
You need to verify eligibility before every code review.
Requesting Code Review
After completing the one-time setup and verifying your eligibility, follow these steps to request a code review appointment:
-
Go to your project repository on Github and click the “Actions” tab.
-
Under “All Workflows” on the left-side, click the “Request Review” workflow.
-
You will see a notice stating “This workflow has a workflow_dispatch event trigger.” Click the “Run workflow” button. When prompted, select the
mainbranch and enter the release you want reviewed.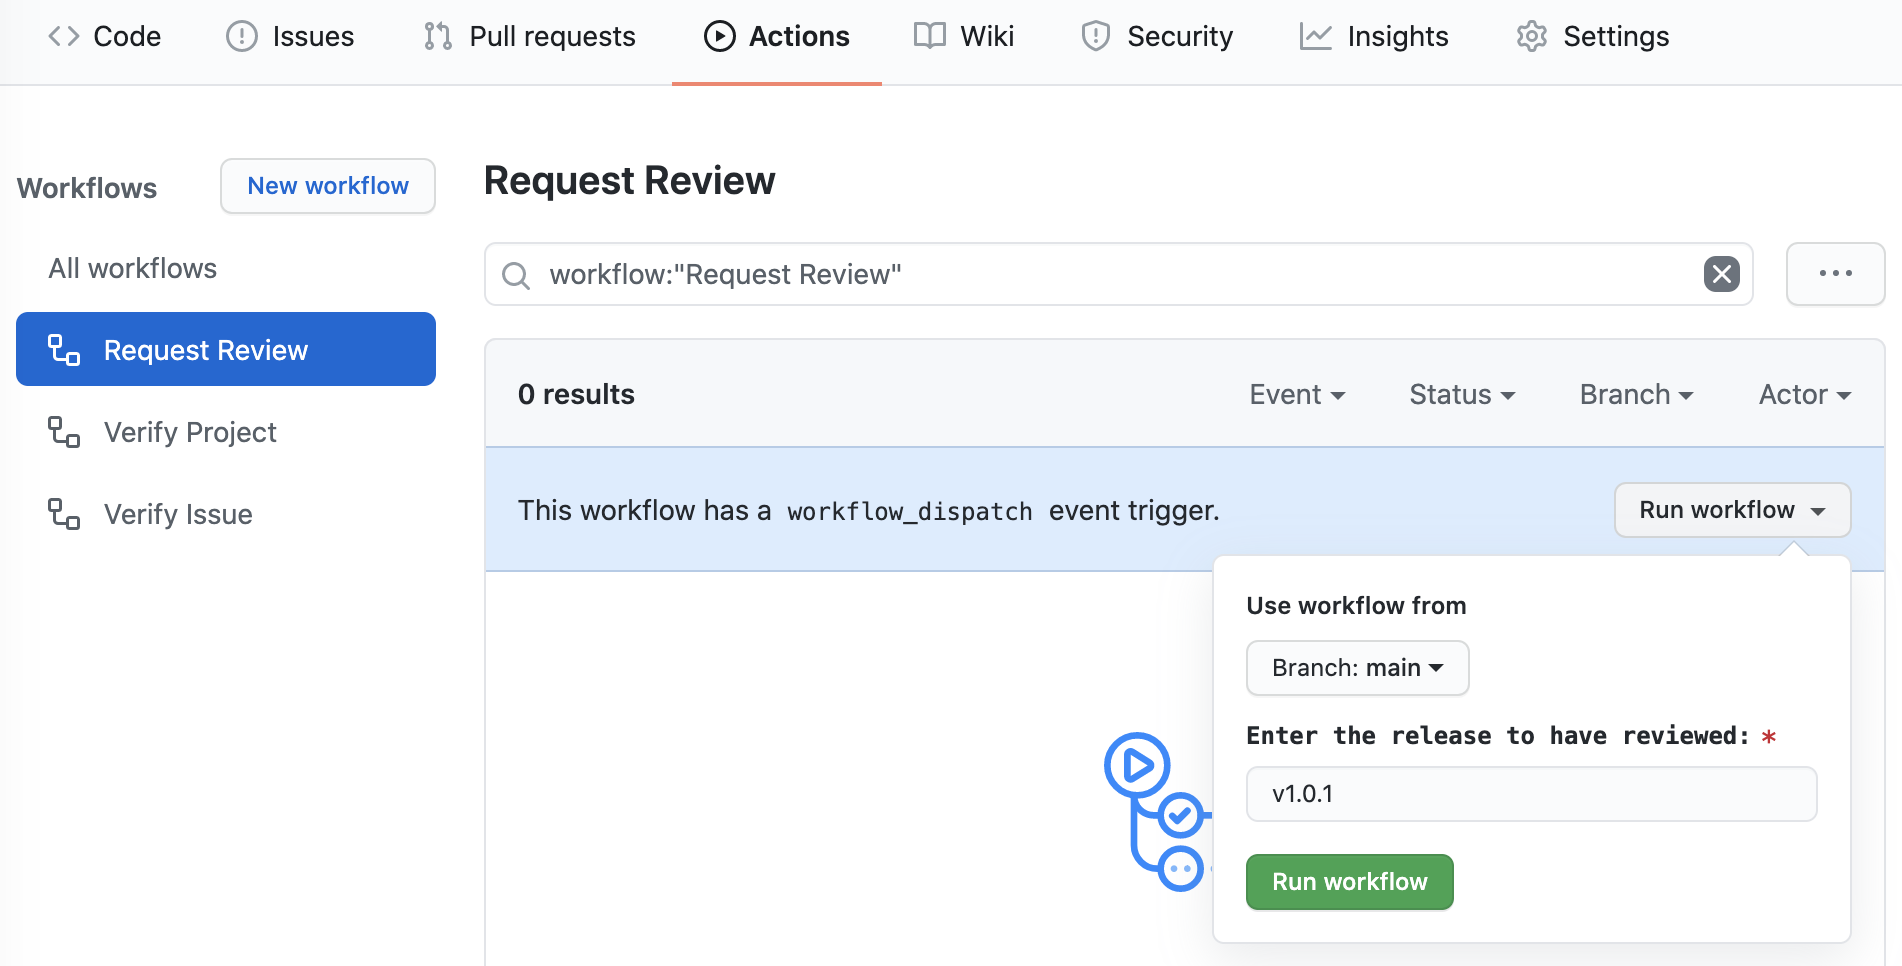
-
Click “Run workflow” and wait to see if the workflow passes.
-
If the workflow passes, a pull request will be automatically created. Click the “Pull Requests” tab to view it. It should look like this:
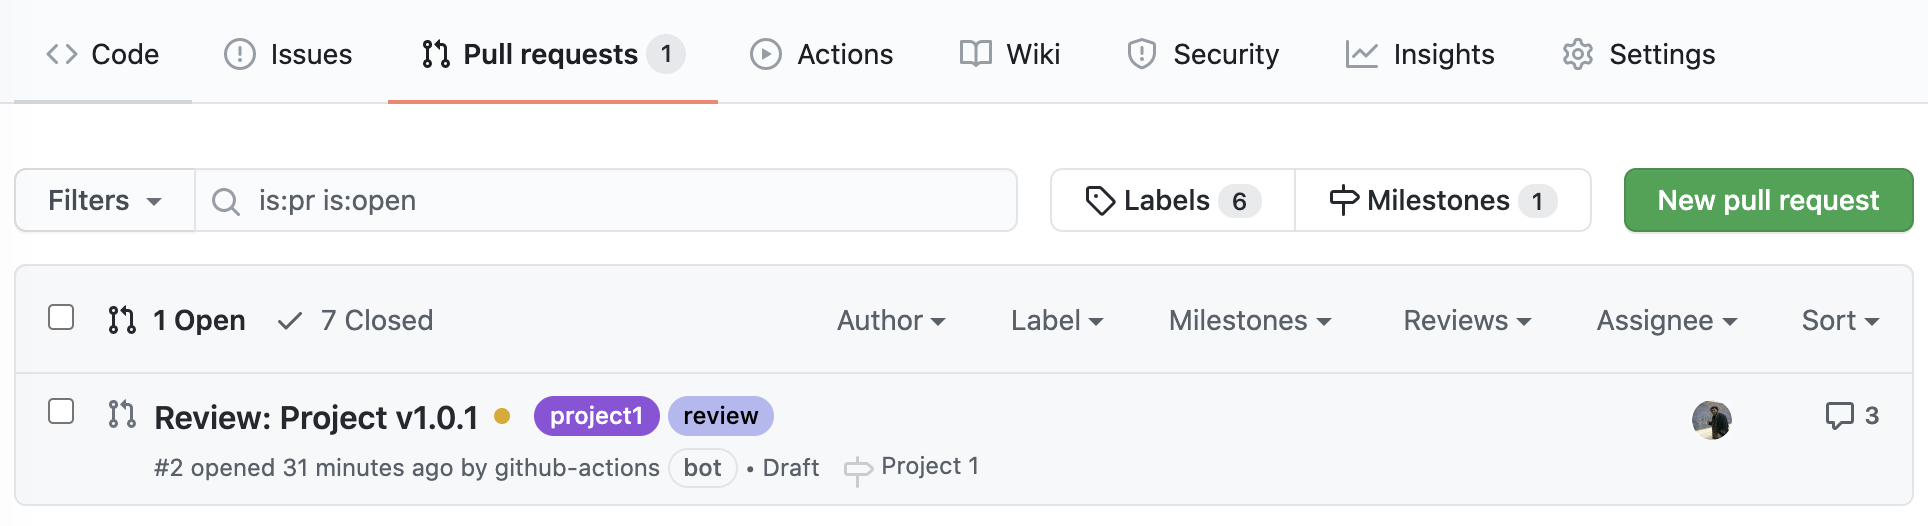
-
Click on the pull request and follow the remaining instructions on the pull request.
-
Publish the pull request, but do not merge or close the request. Once the TA verifies your pull request, you will receive instructions on how to sign up for an appointment.
-
Do NOT merge or close the pull request! Keep it open and unmerged, even after the TA approves your request. It will be used in the actual code review appointment.
You need to do this once per code review appointment until you pass the project design.
Making Changes
You should try to avoid making changes to your main branch after requesting code review. Otherwise, you may end up with merge conflicts when you try to address the code review comments.
If you need to make significant changes, close the pull request, cancel your appointment, and re-request an appointment once you have a new release. Or, alternatively, make your changes in a different branch.
Code Review Grade
The results of each code review may be:
-
Pass: This means you passed code review and do not need to resubmit this project. You may now move on to the next project. Remember to incorporate all of the functionality and design of this project in your next project!
-
Warn: This means you passed code review and do not need to resubmit this project. You may move on to the next project, but there are some comments you must address in your next project submission to avoid deductions in your next review.
-
Resubmit: This means you did not passed code review and must resubmit this project. You must first address all of the review comments and pass the eligibility checks again before requesting another code review appointment.
No matter how many resubmissions it takes, your grade will be based on date of your first code review for that project. Note this is the date of the actual appointment, not the date you requested an appointment. You must plan ahead!
If the appointment date is after the checkpoint deadline, your grade will be deducted 10% (up to a maximum of 30%) per week. See the Schedule for the design deadlines.
Abuse of the code review process may also result in deductions. For example, ignoring issues from a previous code review or missing an appointment may result in –5% to –10% deductions.
Other Considerations
Hey, don’t cheat. See the Project Functionality guide if you are concerned about your progress and/or reach out on Piazza.