The project is broken into two separate Github repositories and Eclipse projects:
-
SearchEngine: This is where you will place your project code. You will have your own private version of this project. The initial template includes some configuration files and a skeleton
Driver.javaclass. -
SearchEngineTest: This is where the project tests files, and expected output files are located. Everyone shares the same read-only repository. It will start with the Project 1 test files first and will be updated throughout the semester with new test files for the other projects.
When we verify the functionality and review the design of your project, we will only checkout the SearchEngine repository each time. This helps avoid having to re-copy the large test files over and over again.
Walkthrough Video
You can find a walkthrough video of these steps here:
Use the same password as the other recordings.
Create and Import Projects
Below is a quick summary of the one-time setup needed for the project:
-
Visit the Project 1 Inverted Index assignment in Canvas and click the Github Classroom link. This will setup a private repository named
project-usernamewhereusernameis your Github username. Unlike homework, you will use this repository the entire semester for all of the projects. -
If needed, follow the Configuring Eclipse guide to setup your compiler and Javadoc settings.
-
Import the repository as a Java Project in Eclipse. See the Importing Eclipse Projects from Github guide for steps. This will create a “SearchEngine” project in Eclipse where you will add your own code for the project.
-
Import the
project-testsrepository at https://github.com/usf-cs212-fall2020/project-tests as a Java Project in Eclipse. This will create a “SearchEngineTests” project in Eclipse where you will find all of the test code and data files.These two projects must be located in the same parent directory! For example
repos/project-usernameandrepos/project-testsshare the same parent directoryrepos.
After importing into Eclipse it should look like this:
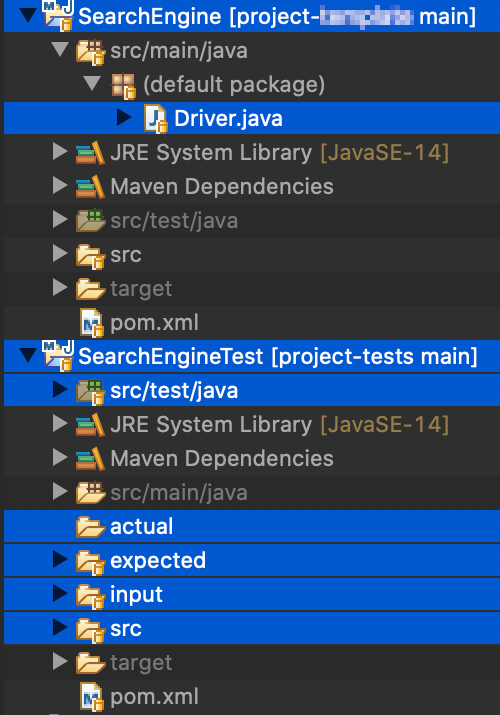
Important files or directories are highlighted in blue. Your view will not have this highlighting.
Once setup, you do not need to go through these steps again.
Verify Setup
Once you have everything imported into Eclipse, try these steps to verify everything is setup correctly:
-
Verify you can run the
Project1Test.javaset of tests in the “SearchEngineTests” project in Eclipse. -
Verify you can make, commit, and push changes to
Driver.javain the “SearchEngine” project in Eclipse. -
Create your first release. Enter
v1.0.0as the tag version and leave the other fields unchanged. There is an example release in theproject-templaterepository. -
Go to the “Actions” tab and make sure the verification script ran for the
v1.0.0release. There is an example action in theproject-templaterepository. It should fail, since you don’t have any code yet.
If you are able to complete all of the above, you should be ready to start your project!
Folder Structure
Here is the rough folder structure for the project and its tests:
├── project-username
│   └── SearchEngine
│       ├── pom.xml (should not need modification)
│       ├── src/main/java
│       │   ├── Driver.java (modify as needed)
│       │   └── (add other *.java files here)
│       └── src/main/resources
│           └── log4j2.xml (optional)
└── project-tests
    └── SearchEngineTest
        ├── pom.xml (should not need modification)
        ├── src/test/java
        │   ├── Project1Test.java
        │   └── (other test files here)
        ├── expected
        │   ├── index
        │   │   └── (expected index-*.json files)
        │   └── (other directories for future projects)
        ├── input
        │   ├── text
        │   │   └── (text files to use as input)
        │   └── (other directories for future projects)
        └── actual
            └── (output files generated by your code)
If you run a test from the “SearchEngineTest” project, the output files will appear in the “SearchEngineTest” project even though your code is in the “SearchEngine” project.
If you run the main method via a Runtime Configuration in Eclipse from the “SearchEngine” project, then your output files will appear in the “SearchEngine” project.